
JIRA is well-known as a tool for project management, and now it’s been made even easier with the JIRA Agile add-on. One can be forgiven for thinking it’s mainly a tool for IT departments so here’s an example that shows there’s no limits to where you can apply JIRA’s capabilities. In the marketing team of Valiantys, we work with JIRA to track projects using a Scrum methodology. Enthusiastic about this tool, we recently decided to adopt it for blog tracking, this time with a Kanban board. Who said JIRA wasn’t made for marketers?
Why JIRA?
Until now we had been tracking blogs in a Confluence page: authors were tagged and received notifications at each change of the page, keeping them informed of the progression of the blogs.
Despite its ease of use and accessibility, we were not fully satisfied with it. We needed more granularity and a customisable notification system. Too many stakeholders were, by default – involved in this page, most of the time without real interest in it. As a result, all the watchers and tagged people were notified, even though the changes did not necessarily concern them. There was too much “noise” around this page, which had a negative impact on the quality of the information communicated.
In addition, Confluence did not offer a clear global view of the blogs, their current status, their owner, and the workload consequently associated. After a reflection about our internal process, one of Valiantys consulting team suggested we create a new JIRA dashboard for blog tracking. We configured it according to a set of pre-established requirements. The result has made our life (and communication between stakeholders) much, much simpler…
Here’s how we track blogs.
First step : Issue creation
The workflow starts when I have an idea for a blog. In order to be transparent about it and to avoid potential duplicates, I log in to JIRA, go on the blog dashboard and push the magic button “create an issue”. This issue is immediately visible to anyone with access to the blog dashboard.
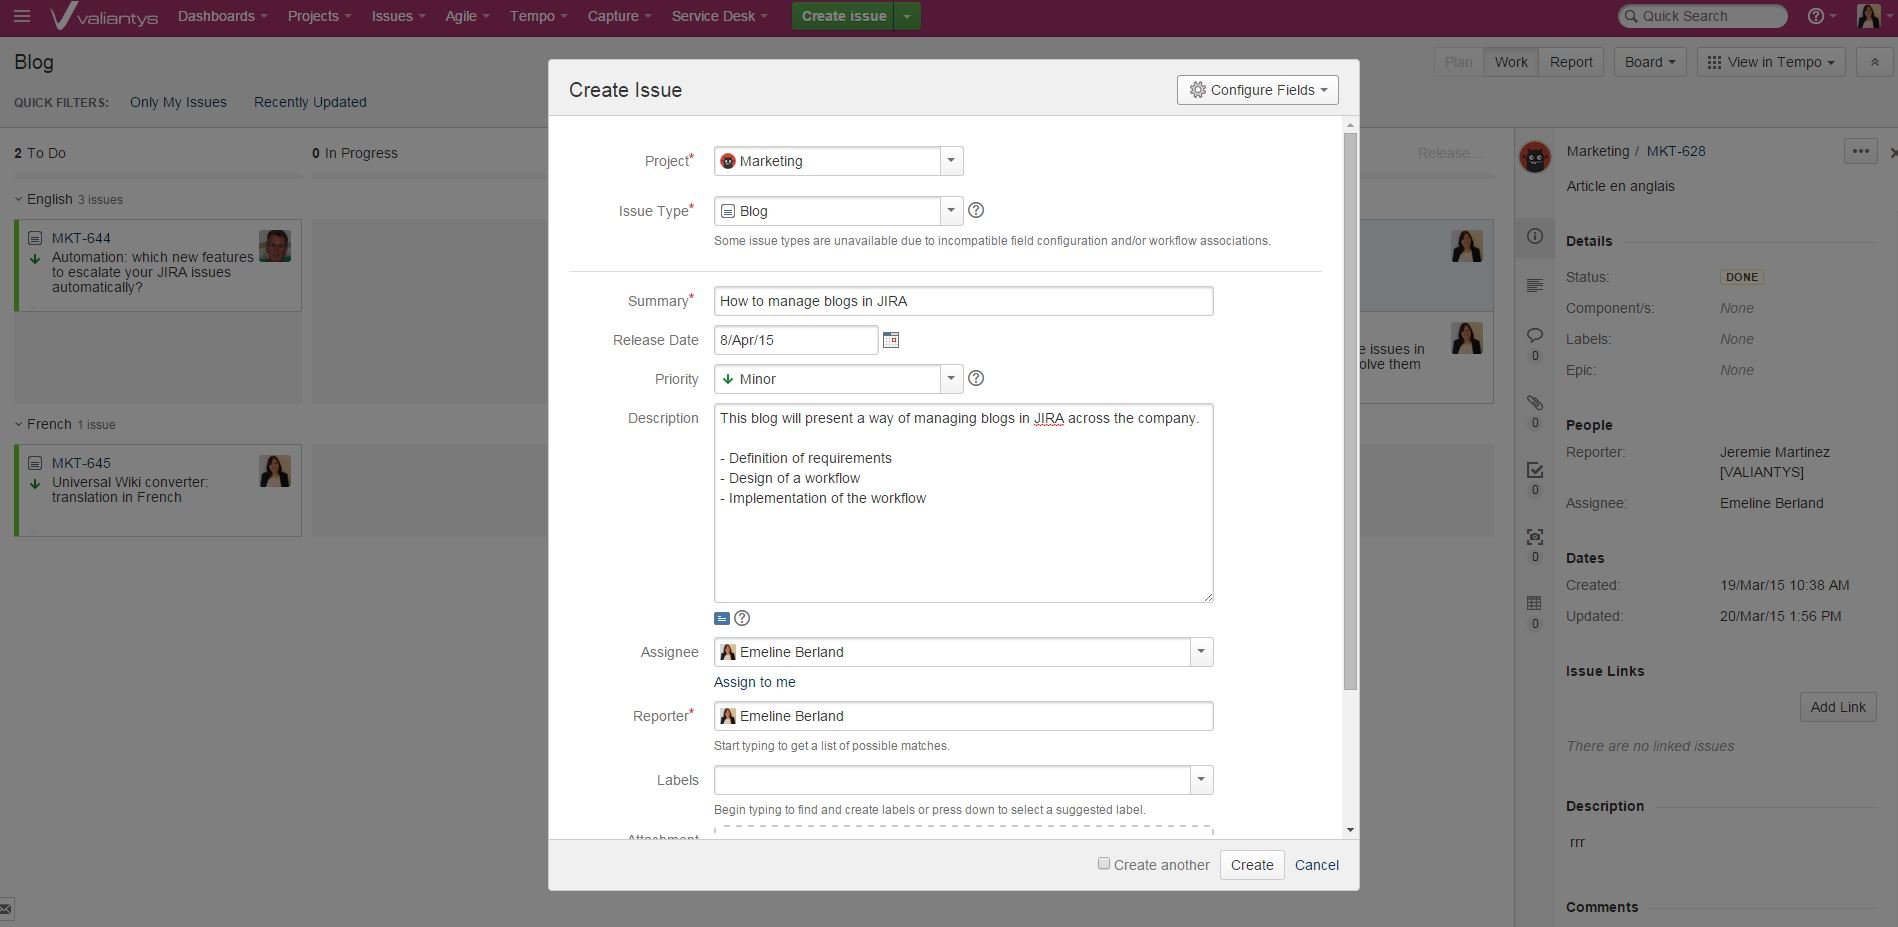
Firstly, I have to select the “Marketing” project, then “Blog” as an issue type.
In the field “Summary” I’ll type in the title of my blog (or the topic if the title isn’t defined yet).
I can add a desired release date and select a priority.
In the “Description” field I’ll add a short description of the blog I’m going to work on and/or its milestones.
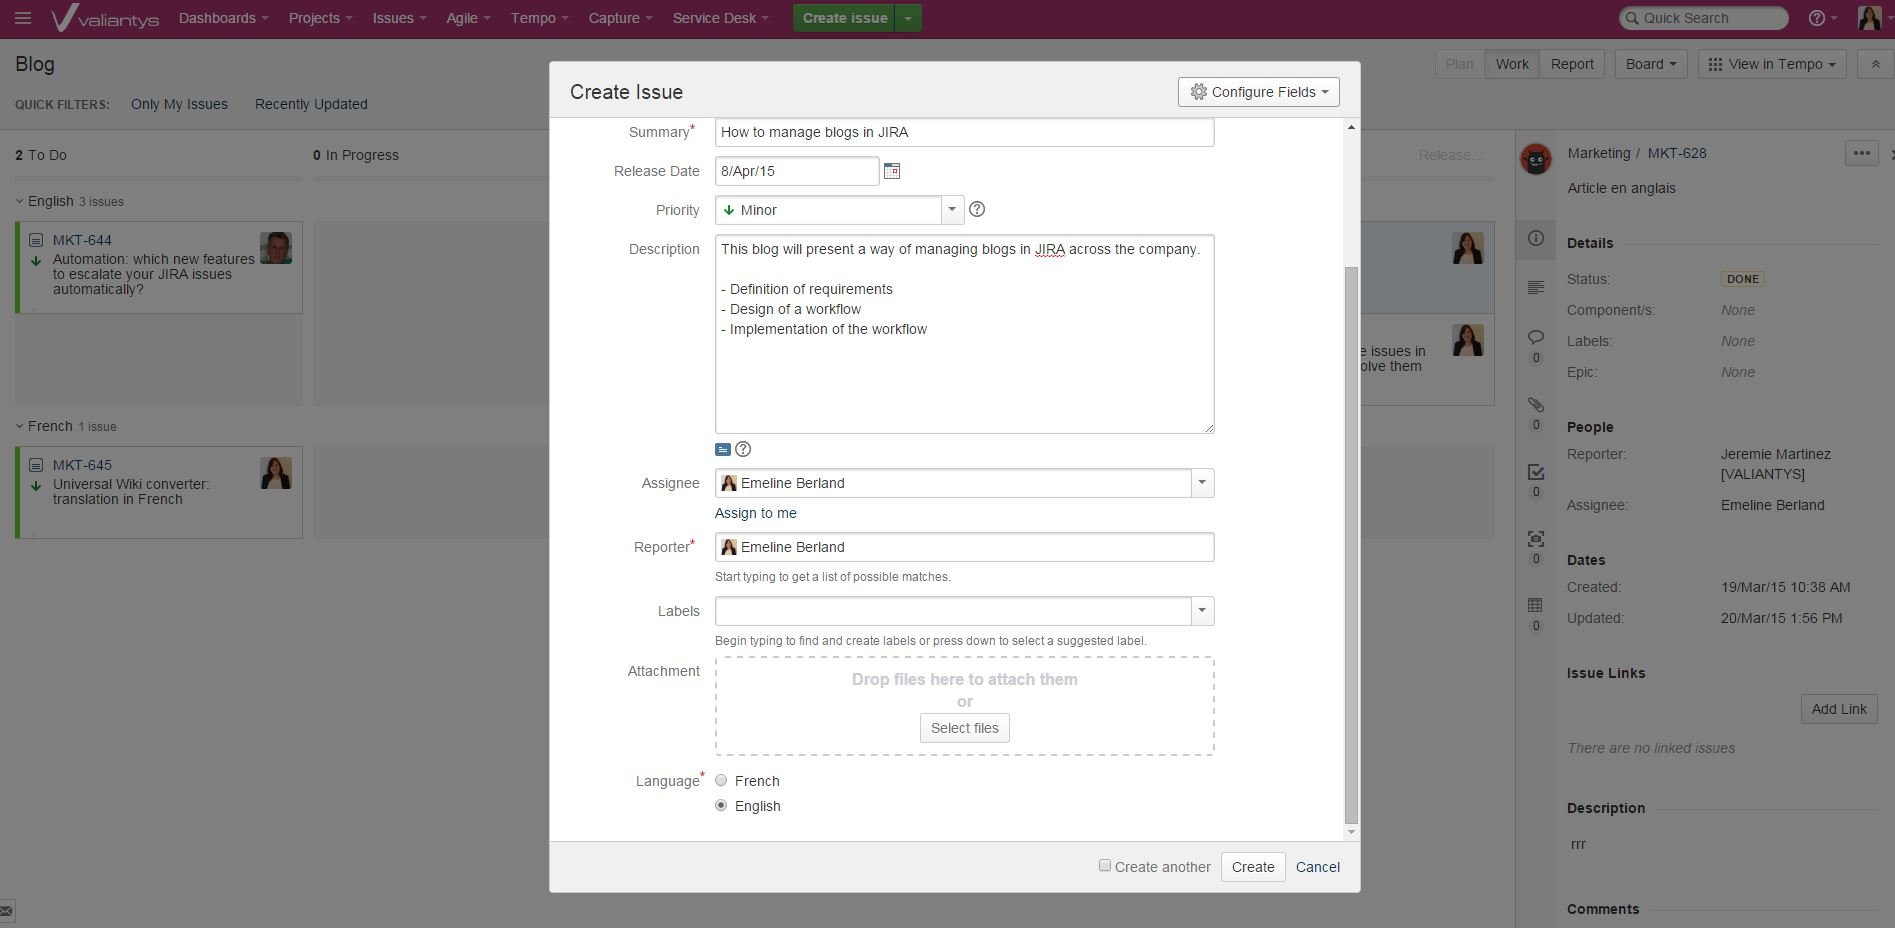
I select my name as assignee as I’m the author and the first step of the workflow concerns me. I also let JIRA set me as reporter in order to keep me notified over the duration of my blog’s lifecycle.
I then select the language of my blog.
Step 2: I write my blog
Once I have started to work on my blog, I drag and drop my issue to “in progress”. I will change the status once i will be finished with my first draft.
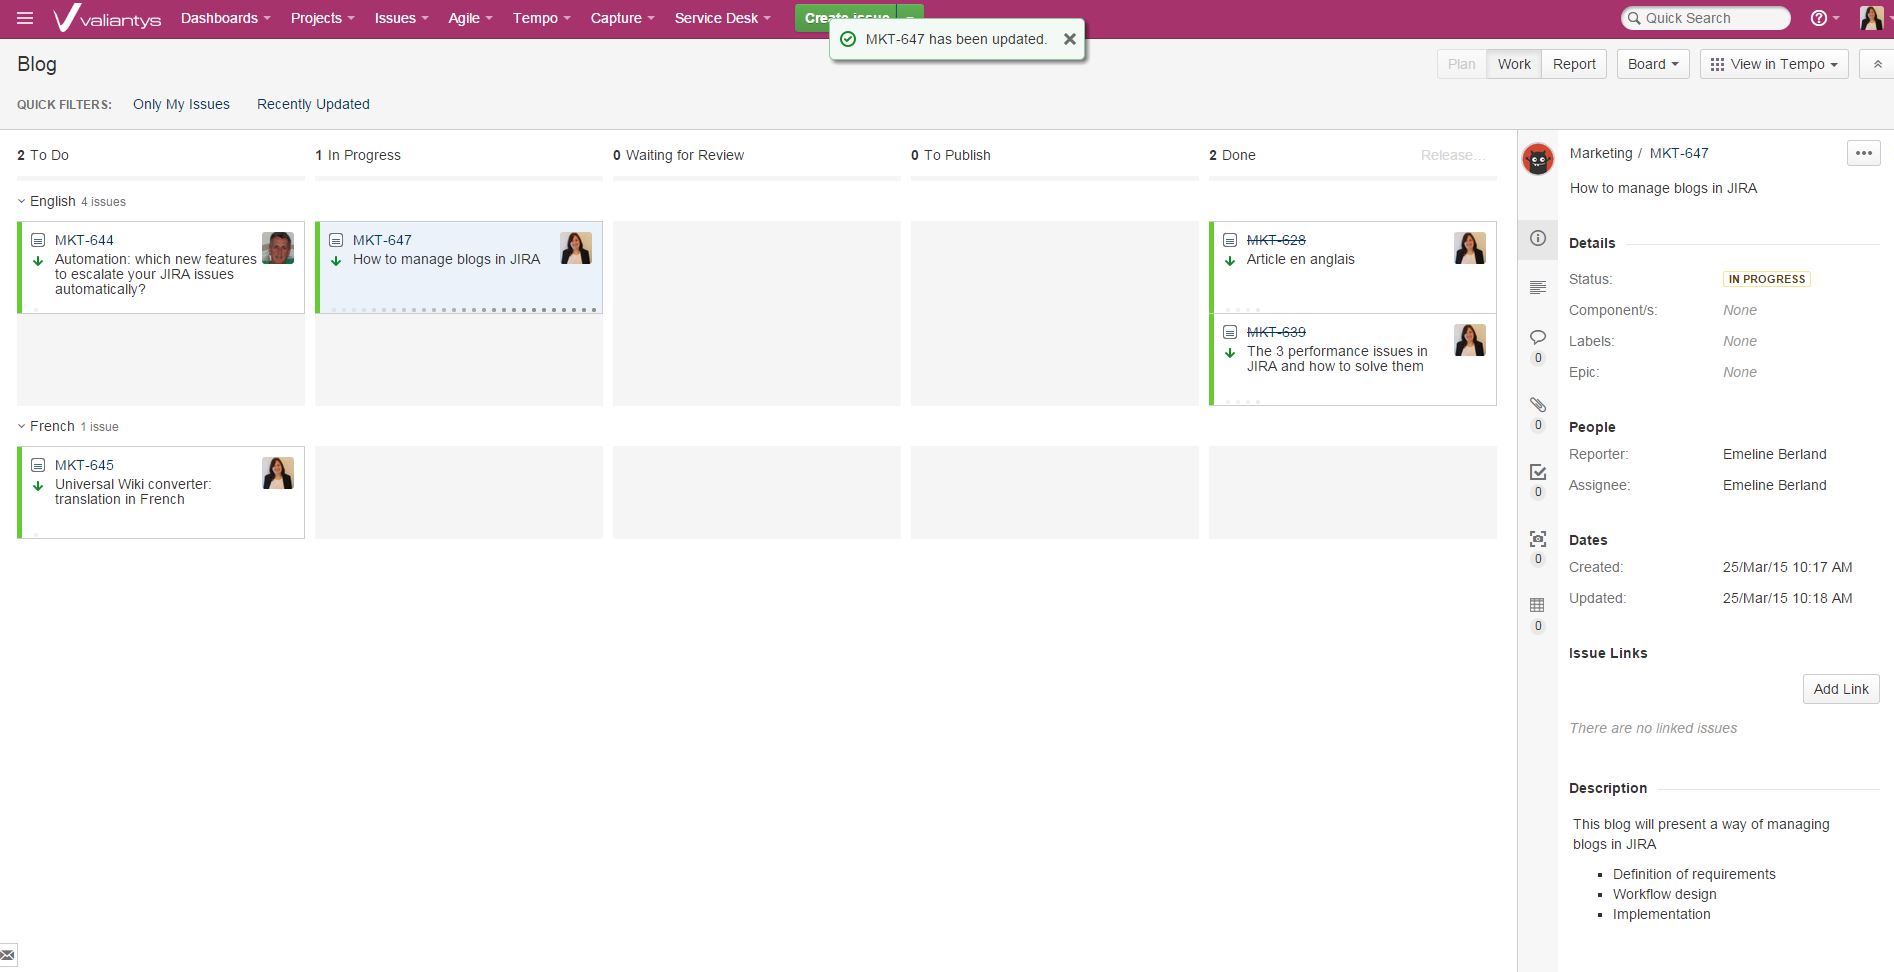
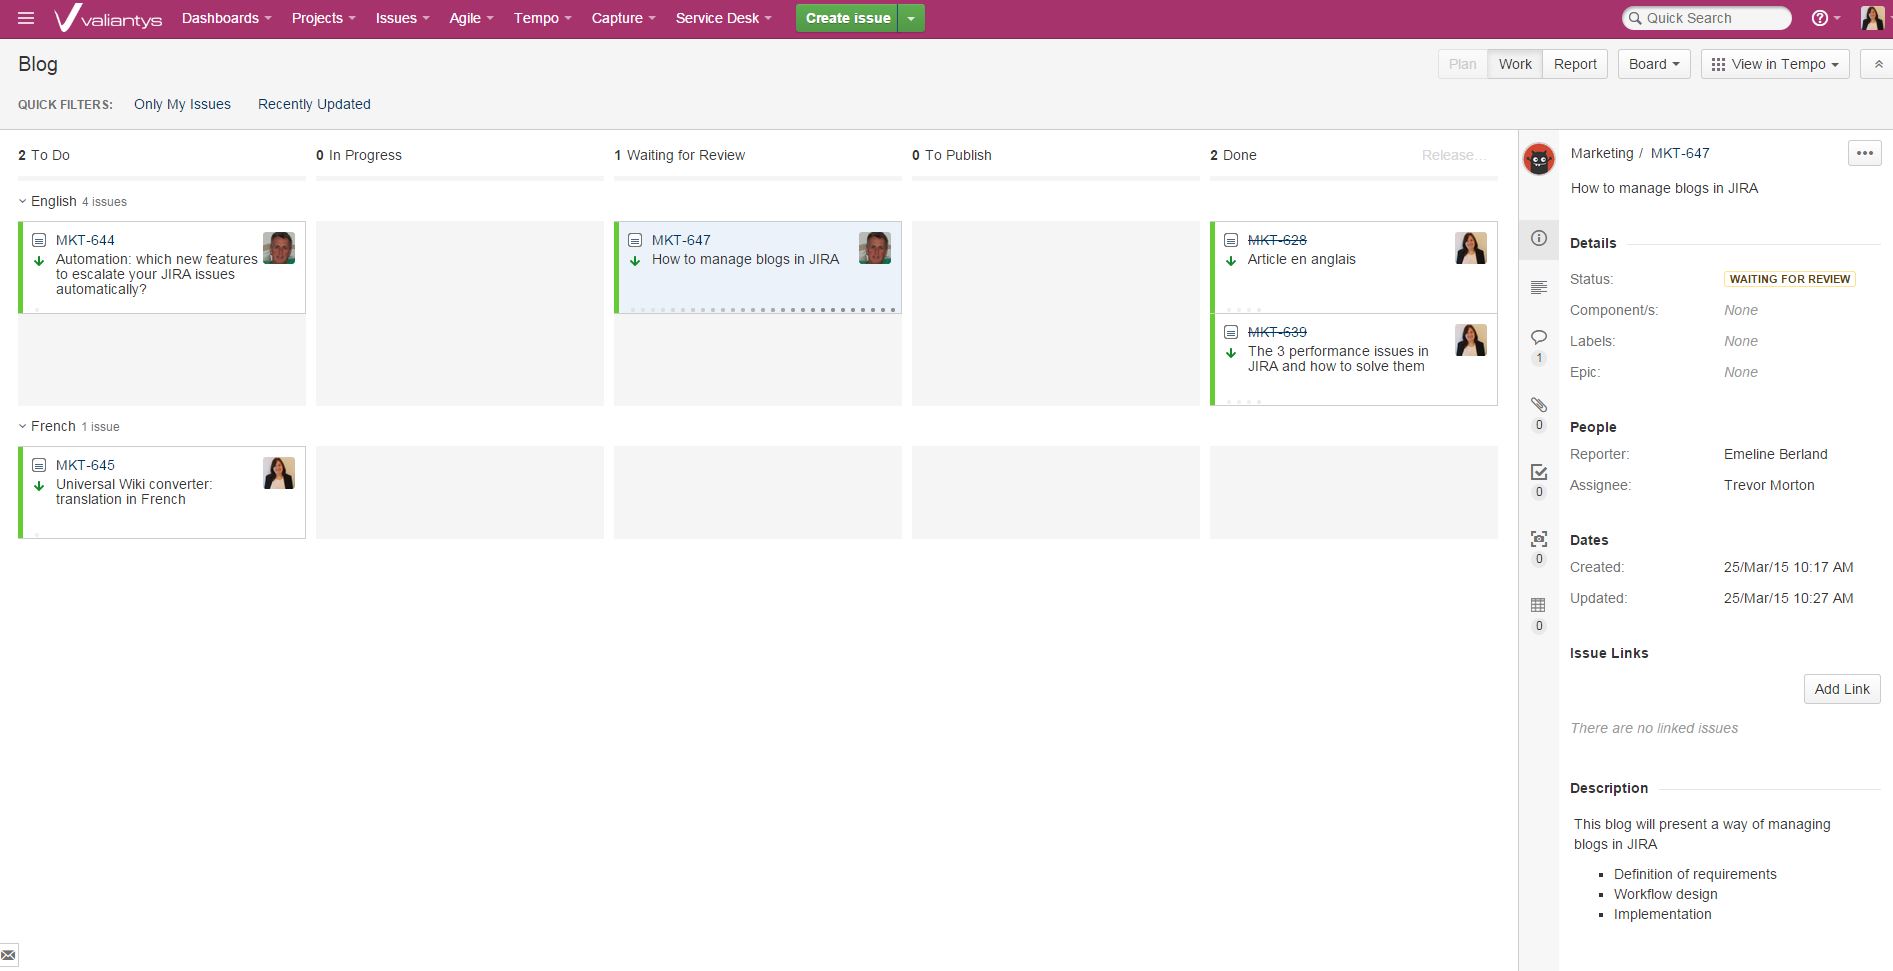
Step 3: I need a review on my blog
Once I’ve finished writing my blog, I attach the file or the link to the issue to make it easy for my reviewer to trace it. I also drag the issue to “waiting for review”.
Now, I have two possible cases.
Peer review
I would like a review on the content, so I assign one of my team-mates.
Once they have finished reviewing it:
- My blog needs some more work: after his/her feedback, the reviewer re-assigns me the issue and drops it back to “in progress” so I can make some changes
- OR my blog doesn’t need modifications, it is ready for editorial review. In this case, the reviewer just selects me again as assignee, leaving the issue in the status “waiting for review”. It will then be up to me to assign the issue to my final reviewer.
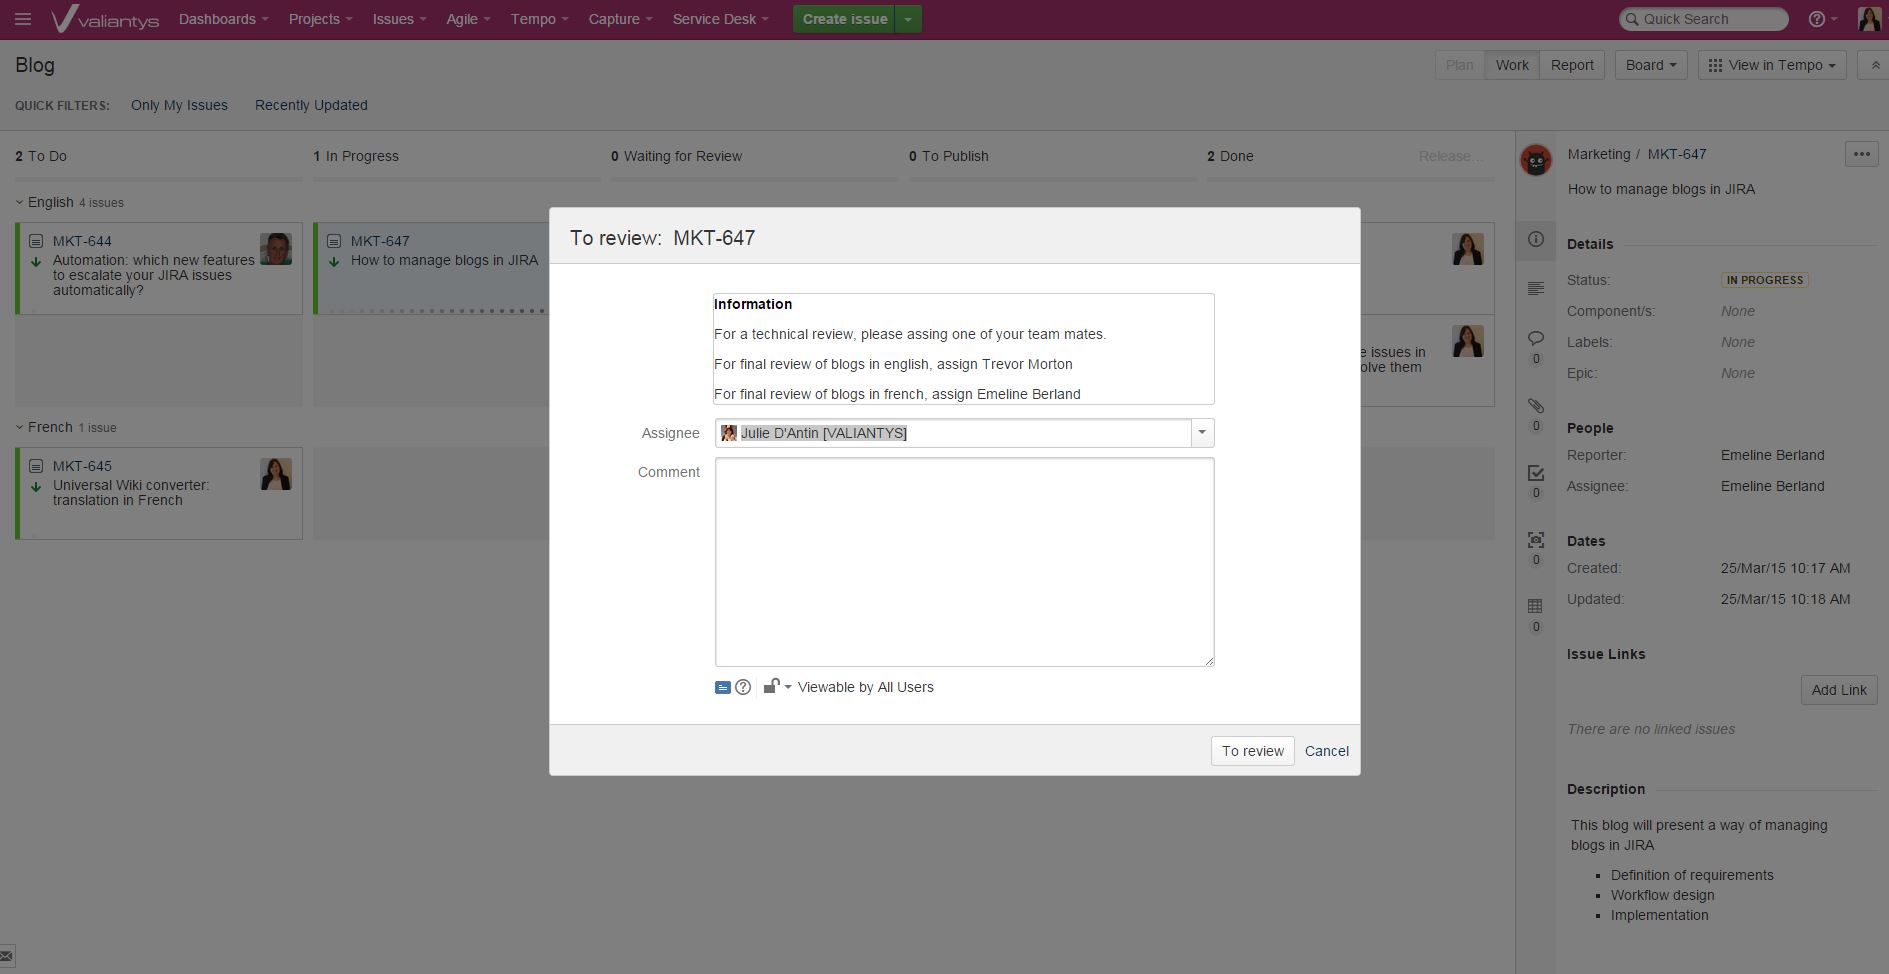
Editorial Review
My blog is ready, I’m happy with it. The marketing team is going to do the final review.
Depending on the language of the blog, I assign it to our English reviewer, or to the French reviewer.
Step 4: Good to go
Once the editorial review is finished, the issue is moved from “waiting for a review” to “to publish”. At this stage, the blog is ready to go and is scheduled.

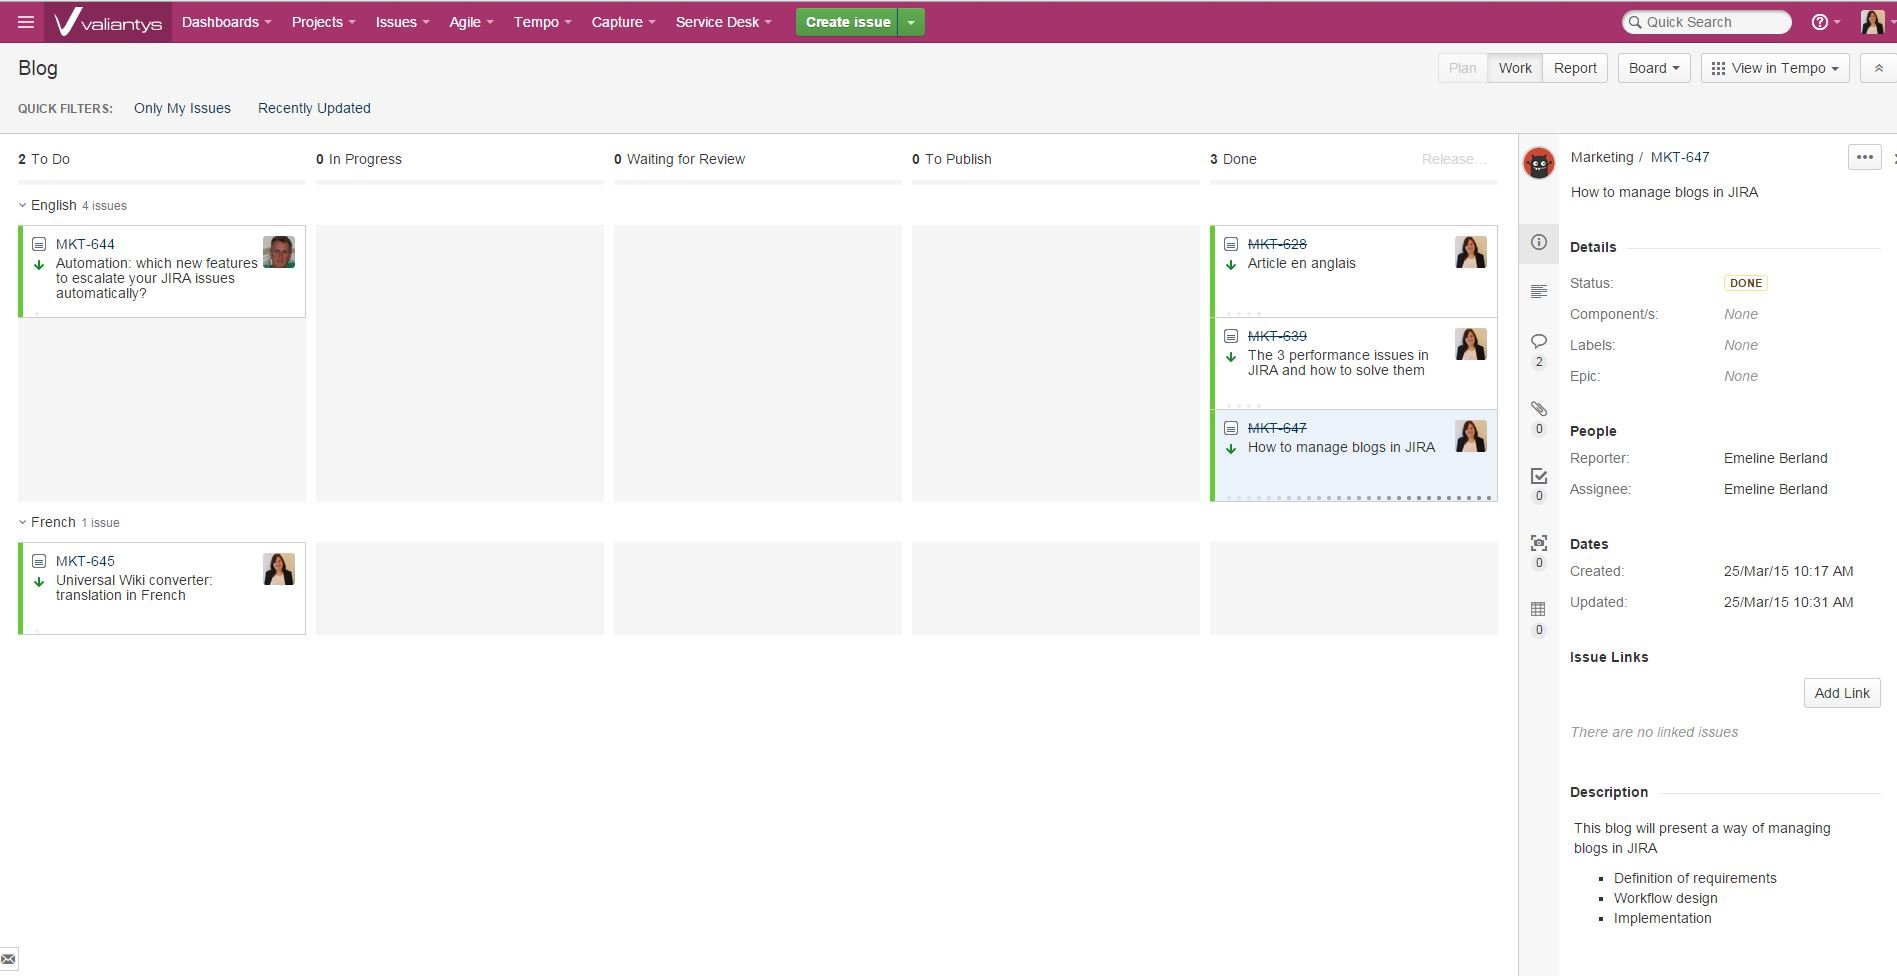
Step 5: Published…
The marketing team publishes the blog. As reporter of the issue, I am notified with an email, and thanks to HipChat and WordPress integration, a message is posted in the company’s main room, keeping everyone up-to-date with the blog activity.
Conclusion
JIRA is a very flexible tool capable of being used to industrialise all kind of processes, marketing being no exception. The JIRA Agile add-on makes it Child’s Play for anyone to use, plus – it offers an overview of the workload at a glance. The notification system also makes teamwork much easier: everyone is notified at the right time, about the relevant information. It is definitely a keeper !
What about you, how do you track your marketing or other tasks? Leave a comment and share with us your experience of task tracking in an out of the mainstream context.