Waving goodbye to manual admin
Are you sometimes overwhelmed by recurring tasks? Do you have to complete them manually, constantly remember to handle them and feel like they invade your thoughts and agenda every day?
Chances are you don’t want to deal with every single issue created by your users, and you might be wondering how to automate them.
In every JIRA installation, the project manager or JIRA administrator has to spend a lot of time figuring out which issues need to be relaunched and which ones need to be abandoned. If you’re looking for a solution to automate tasks instead of completing them every week (or every day), you’ll probably be interested in the JIRA Automation add-on.
JIRA Automation add-on
Thanks to this add-on, I can now identify users who do not work on an issue with the priority Blocker. What’s more, it is done automatically, so I don’t need to spend time looking for these issues and writing to each user. From now on, I only have to find the correct JQL filter, write my comment and apply the automation. Automation is time-saving and enables me to spend time I did not have before completing other tasks.
After some researches around this add-on, I discovered there were many other useful functions… and it would be a pity to keep them to myself!
Unfortunately, this is the Beta version but it works as intended for all my tasks and I am sure it will quickly become a major add-on (if not directly included in the next version of JIRA!). Let me tell you a little bit more about this add-on…
What actually is Automation?
This add-on, developed by JIRA, has been around since January 2014. The first idea was to develop a new add-on to replace the current Jelly and the auto-transition listener add-on. The goal was to have the same configuration, but in a more user-friendly way.
The main features of Automation for JIRA are:
- Executing a JQL script in a given time frame
- Adding comments on existing issues
- Configurating automation easily
- Reacting to various JIRA events
- Accessing source code to add actions/triggers
Regarding all these configurations, I could define two different use cases for this add-on: the first one for JIRA, the second one for JIRA Service Desk. Firstly, I will go through the example of JIRA.
Automation with JIRA
Here are a few ideas you may wish to implement to take your team to the next level of efficiency if you are a project manager:
- Comment on an issue if it hasn’t been updated for 15 days
- Change a specific field if an issue hasn’t been updated for a week
- Comment on an issue every hour if it has a Blocker priority and has not evolved
- Trigger a transition if someone logs work on an issue
- Trigger a transition if a specific field has been filled in
- Reset a field if an issue is reopened
- Assign a reopened issue to the last person who commented it
- Update a field every 24 hours
- Update a field if the due date is in less than four hours
Automation with JIRA Service Desk
Automation can help with With JIRA Service, too, by helping teams provide a better service.
Here is a list of possible rules you can create for JIRA Service Desk:
- Change the priority of an issue if it was commented by somebody (a client for example)
- Send a survey to your clients once their issue/ticket has been resolved
- Call a client again if he did not answer your last comment a week before
- Send an automatic response when a ticket is raised
- Comment on an issue if your SLA ends in less than 10 minutes (and to restrict this comment to your developer)
- Inform your client that your developer is on holiday and will get back to him as soon as he returns
Feel like this is what you need in JIRA? Let’s see how you can configure these use cases.
Automation in action
Part 1: summary
To access the Automation add-on after installing it, go to System > Add-ons -> Automation.
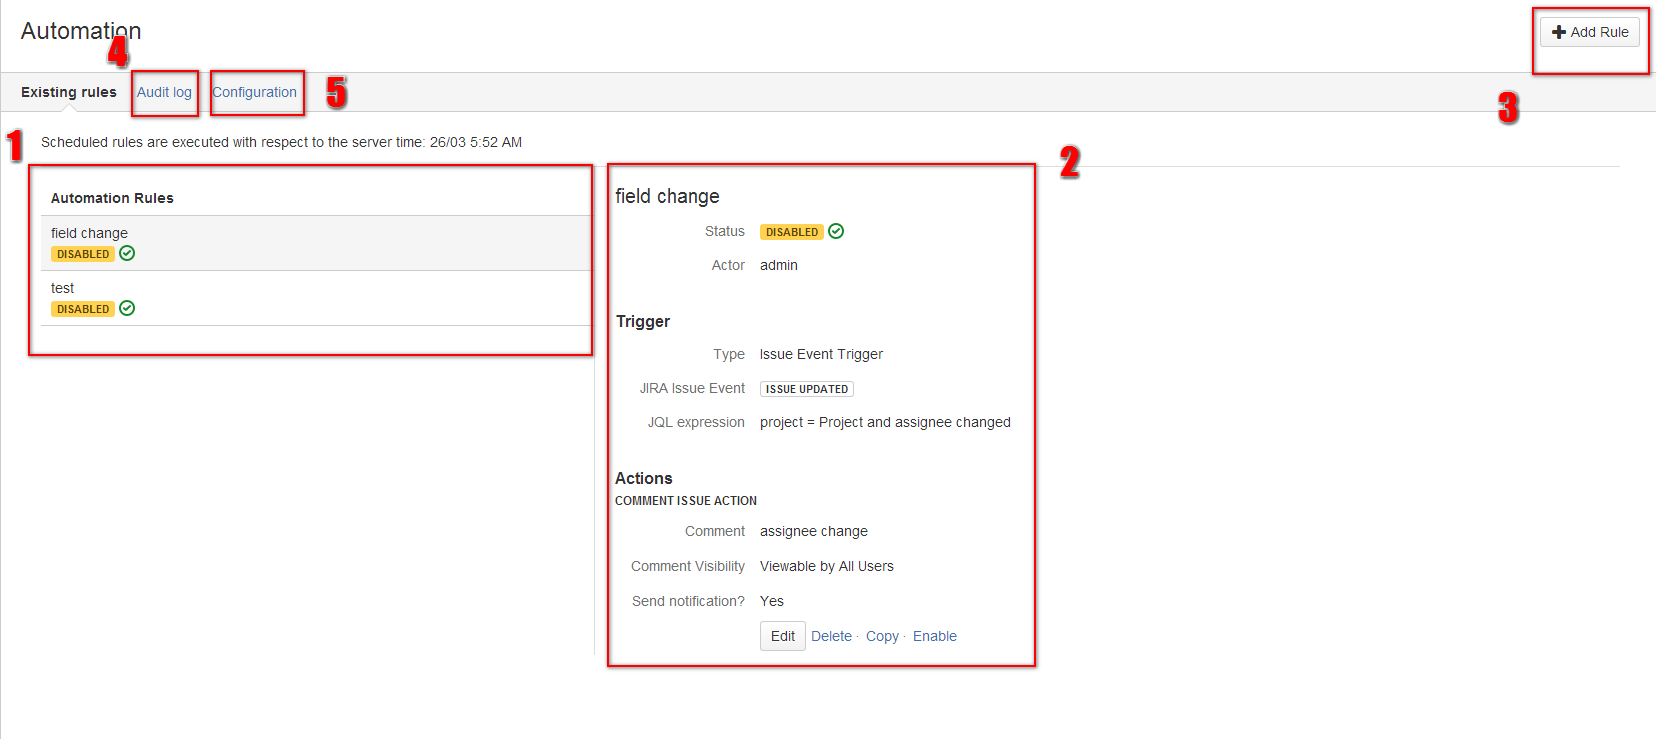
This page contains all the information about your current configuration of Automation
- Automations you have already configured and their states (enable/disabled)
- Details of the automation selected:
- name and status
- trigger
- actions
- Create a new rule (/automation) > See part 2
- Audit log > See part 3
- Configuration > See part 4
Part 2: new rule
Screen 1: rule configuration
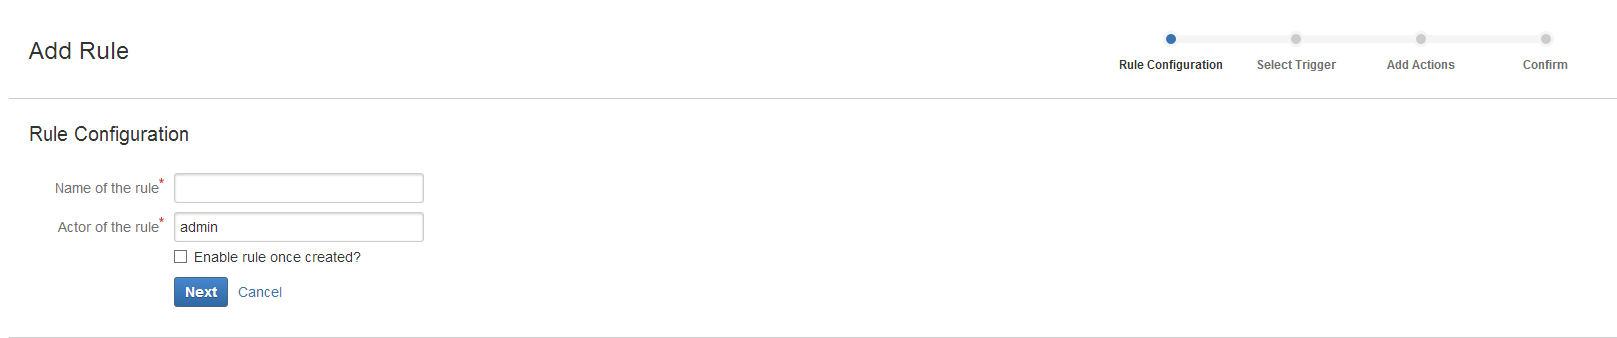
Add a name and an actor to the rule. (the actor will be the name used to define the rule, for example, it will be the user name for a new triggered comment). You can automatically activate this rule once it is created.
Screen 2: select trigger
CASE 1 : JQL Filter Trigger
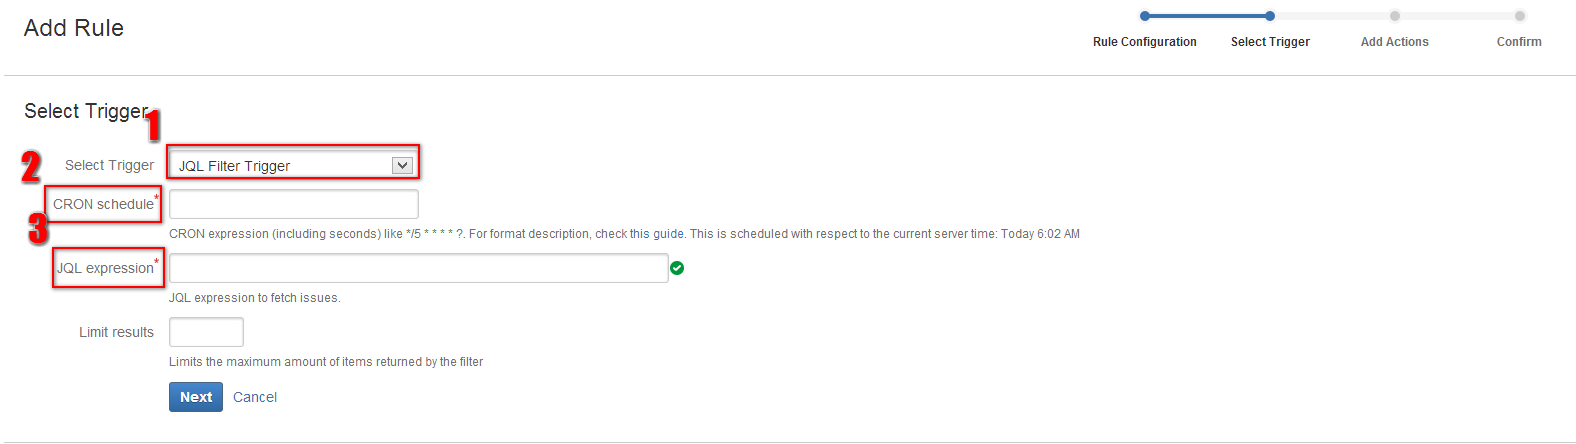
- If you choose JQL Filter Trigger, you will be able to launch a repetitive task depending on your JQL Filter
- Firstly, choose when you want to trigger this action using a CRON expression
- Finally, apply this action to your JQL query. (For example, only issues in a specific project with a specific assignee)
You can limit the result of your JQL query. This rule will only be applied to the first X results of your JQL search.
CASE 2 : Issue event trigger

- Select the issue event you want (default issue events from JIRA)
- Apply this action to define issues through JQL search.
You can restrict the trigger action by defining a specific user.
Scren 3: add actions
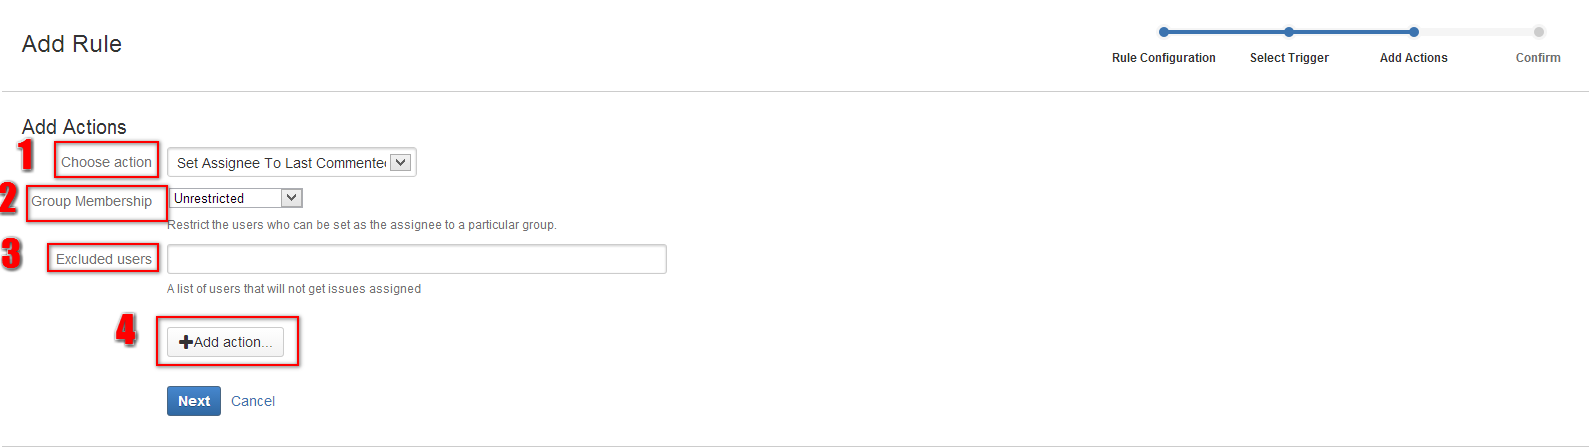
You can choose different types of actions:
Case 1 – set the assignee to the last commenter
2/3 – You can restrict assignees to a group or defined users.
Case 2 – edit labels action
You can choose the labels you want to add to your issues and you can choose which labels you want to remove.
Case 3 – comment issue action
You can add a comment and restrict it to a user group (for example if you want it to be seen only by your developers).
Case 4 – transition issue action
You can choose the transition corresponding to the workflow to trigger the action. Be careful, this transition must be valid !
You can edit fields during the transition. The format will be the following : customfield_id=new_value or field=new_value (one per line)
Case 5 – edit issue action
Edit the fields you want in your issue. For each case, you can choose to deactivate the notification.You can add as many actions as you need.
Screen 4: confirm
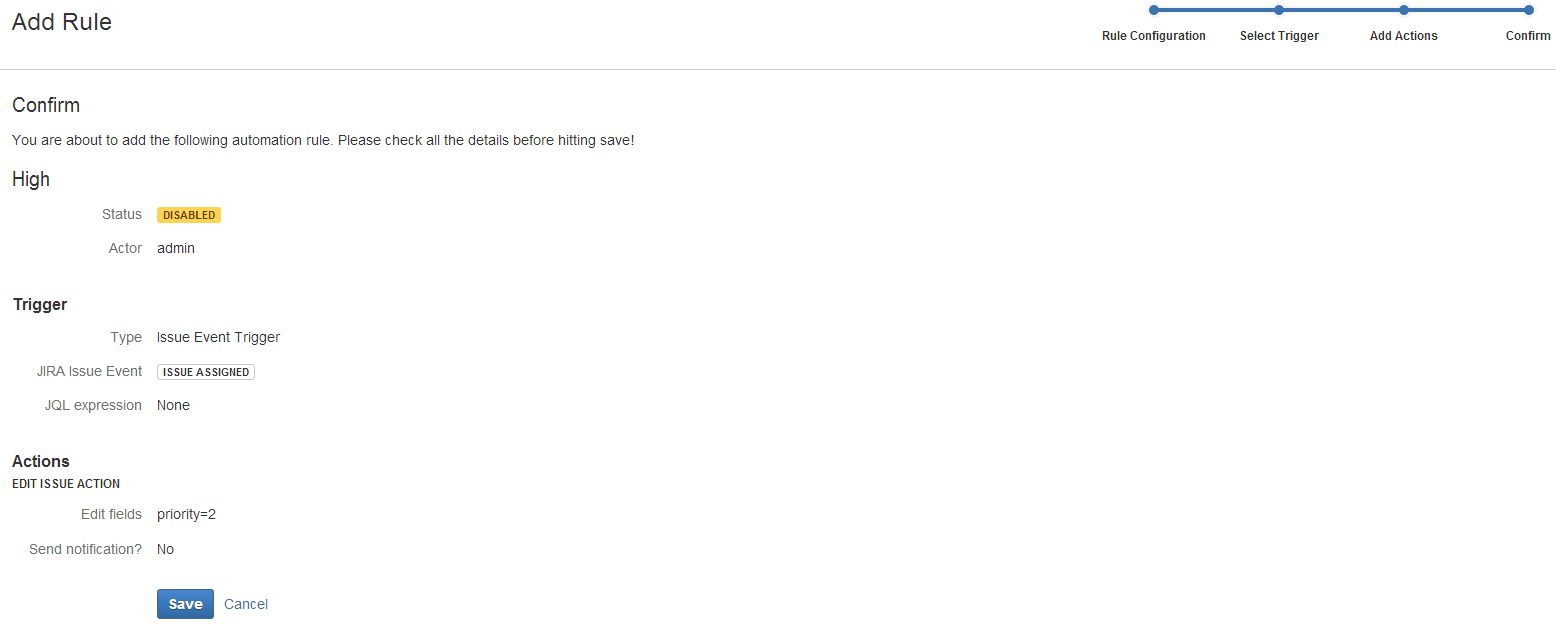
This last screen will display each configuration you made on this rule. (You will find the same information on Automation’s homepage)
Part 3: audit log

Every rule that will be created, deleted, deactivated and triggered will appear on this tab.
Part 4: configuration
The configuration tab enables you to define the number of rules to trigger in a short time.
How much does it cost ?
Now onto the important question – how much money do I have to spend?
Automation is free, but only available for download instance in Beta. You will not find any support nor documentation for now, but you can create an issue on the Bitbucket page (login mandatory) where the source code of this add-on is available.
Try Automation now
References
Add actions /triggers on Automation